Product Details
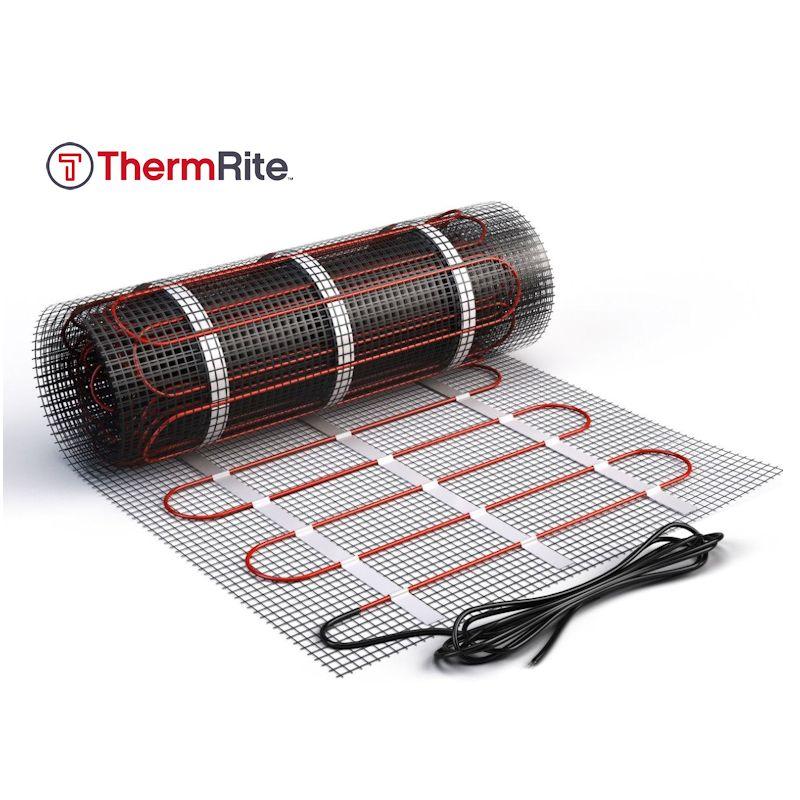
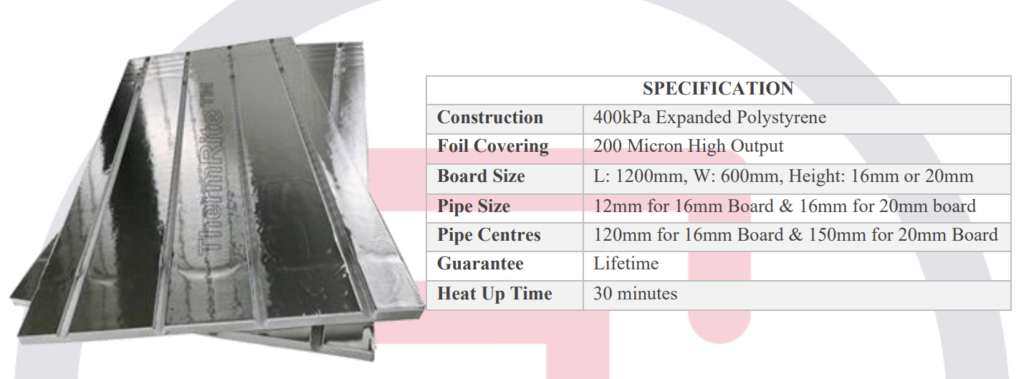
ThermRite™ PRO is a premium dual purpose overlay panel constructed from an extremely high compressive strength (400kPa) EPS board, with a factory bonded high output 200 micron foil covering to the topside of the panel.
This construction is designed to provide superior heat output, coupled with high strength and stability. The boards can be installed onto any stable existing floor, are designed to be tiled directly upon and are also suitable for most floor finishes, making them the ideal solution for installations where the final floor finish is yet to be decided.
ThermRite™ PRO has been tested and approved by Instarmac, for use with their Ultra range of adhesives, levelling compounds and primers as detailed in our installation instructions.
ThermRite™ PRO panels are simple and fast to install using our ThermRite™ PRO Contact Adhesive spray. Alternatively, they can be bonded down using our Instarmac Ultratile Proflex S2 adhesive.
Installation Details
To ensure correct installation please read and follow the details below – should you have any queries before or during installation then do not hesitate to call our team before progressing – we are here to assist.
Installing ThermRite™ PRO Boards for solid floor finishes
This method permanently bonds the boards to the floor and is ideal for tile floor finishes, or when self-levelling prior to laying vinyl, bonded wood and carpet finishes
1. Prepare the floor
Prior to commencing installation, the floor substrate must be solid and stable. Any loose material must be removed from concrete subfloors, and floorboards and wood subfloors must be screwed down firmly to ensure no movement. Floors must be dry, structurally sound and solid and old floor coverings removed. For the best finish, all floors should be flat and level prior to laying the overlay panels. Existing floor boards may first need an overlay of suitable plywood screwed down to the floor boards to create a solid and stable surface. Clean the floor to remove all dust, dirt oil and grease.
For installation onto newly laid screed or concrete floors, the moisture content must be checked to ensure the subfloor is completely dried prior to commencing installation.
2. Loose lay the boards
Lay out the ThermRite™ PRO boards onto the floor, ensuring correct orientation of the boards to match your pipe layout diagram if you have one. Boards can be cut by hand using a utility knife or fine toothed
saw. If slight amendments to the pipe channels are required they can be cut using a utility knife or by electric router. If cutting additional turns into a board you must ensure turns match the radius and are no
sharper than the turns on the manufactured board.
Once all boards are satisfactorily laid into position and the floor area completely covered, number the boards on the top surface using a marker pen.
3. Fixing ThermRite™ PRO Boards
(a) Bond Using Spray Contact Adhesive Method:
Ensure the subfloor is prepared as detailed in item “1” above. For wood subfloors you may need to overlay with a suitable plywood to fix any holes, level issues or uneven floorboards. For concrete/screed subfloors you may need to self-level the floor first to fix any holes, level issues or uneven floors.
As the adhesive is applied via an aerosol spray you must ensure adequate ventilation and doors and windows must be opened prior to commencing and remain open during installation. Suitable protective clothing should be worn including a face mask and gloves.
Ensure spray cans are at a temperature not lower than 16°c. Spray can temperature can be adjusted using warm water if required.
Prior to commencing fixing the boards, draw around each board onto the floor, this will give you a guide of where to spray.
To fix the ThermRite™ PRO boards to the subfloor you must ensure BOTH the subfloor AND the underside of the boards are sprayed with a solid unbroken layer of the contact adhesive.
To commence bonding the boards, shake the can well, hold it horizontally approximately 15cm from the floor surface, spray the adhesive to the floor using a sweeping arm movement to ensure a consistent and even coverage of adhesive without any breaks but without over applying. Then apply in an identical manner to the underside of the ThermRite™ PRO board. Once complete there should be no area of the floor or the board without a covering layer of adhesive.
Note: The area of adhesive applied should slightly overlap the board perimeter you have marked on the floor, therefore ensuring no unglued areas around the perimeter of the board.
Allow both surfaces to become tacky. Only once both surfaces are tacky, should you carefully place the board onto the floor area – note that once applied it may be difficult to adjust the position of the boards so ensure the board is laid in the correct position. Make sure all of the board is flat and in contact with the adhesive, before applying firm pressure to the entire topside of the board.
Prior to full installation we recommend testing a small area to familiarise yourself with the bonding process.
(b) Bond Using Ultra Tile Proflex S2 Adhesive Method:
Ensure the subfloor is prepared as detailed in item “1” above. For wood subfloors you may need to overlay with a suitable plywood to fix any holes, level issues or uneven floor boards. For concrete/screed subfloors you may need to self-level the floor first to fix any holes, level issues or uneven floors.

Apply undiluted Ultra Floor Prime-it MSP to the back of the boards using a paint brush or roller, ensuring full and even coverage. Allow to fully dry.
Dilute Ultra Floor Prime-it MSP as 1 part primer to 3 parts water and apply to the subfloor ensuring full and even coverage. Allow to fully dry.
Once both the underside of the board and the subfloor are fully dry, commence laying Ultra Tile Proflex S2 Adhesive to the subfloor. Comb the adhesive out using a notched trowel to achieve a minimum 3mm consistent and even bed. Apply the boards to the adhesive ensuring all of the board is flat and in contact with the adhesive, before applying firm and even pressure to the entire topside of the board, to create a flat top surface free of any bumps and hollows. If additional fixing is required to wooden floors then screws and washers can be used.
Ideally, the boards should be left to set for 24 hours prior to pipe installation.
4. Tiling Onto ThermRite™ PRO Boards
2 options are available – Option 1 is suitable for all applications to keep floor build up heights low but tiles must be larger than 10cm x 10cm.
Option 2 is ideal in scenarios where the floor finish will not be applied immediately and the leveller therefore encapsulates the pipe to protect it before and during tile installation.
(a) Option 1: Tiling Directly onto ThermRite™ PRO panels using Ultra Tilefix ProFlex S2 adhesive
Ensure the boards are clean and free of grease, oil and dust.
Apply undiluted Ultra Floor Prime-it MSP to the top of the boards ensuring full and even coverage. Allow to fully dry. Bond the tiles using Ultra Tilefix ProFlex S2 adhesive as a consistent and unbroken combed bed, ensuring no voids between the tiles and adhesive. Allow the tiles to set for a minimum of 24 hours. Confirm once fully set before commencing grouting using a suitable flexible grout.
(b) Option 2: Self Levelling onto ThermRite™ PRO panels using Ultra Floor Level-it 2
Ensure the boards are clean and free of grease, oil and dust.
Apply undiluted Ultra Floor Prime-it MSP to the top of the boards ensuring full and even coverage. Allow to fully dry.
Apply Ultra Floor Level-it 2 over the entire board area ensuring no voids or air pockets, to a minimum depth of 5mm over the pipes for tile floor finishes (10mm for all other floor finishes). Allow to fully dry
(normally 24-48 hours).
Apply undiluted Ultra Floor Prime-it MSP to the top of the Ultra Floor Level-it 2 ensuring full and even coverage. Allow to fully dry.
Bond the tiles using Ultra Tilefix ProFlex SP adhesive as a consistent and unbroken combed bed, ensuring no voids between the tiles and adhesive. Allow the tiles to set for a minimum of 24 hours. Confirm once fully set before commencing grouting using a suitable flexible grout.
NOTE: Upon completion of tiling and grouting as detailed in both Option 1 and Option 2, the floor should be left to cure for a minimum of 14 days. Only after this period should the underfloor heating system be turned on at the lowest heat setting. The heat setting can then be increased by 5°c per day to finally reach its normal working temperature (45-50°c). Failure to follow this initial heat-up instruction may damage the installation and floor finish.
5. Applying Vinyl, Engineered Wood, Laminate & Carpet onto ThermRite™ PRO Boards
Ensure the boards are clean and free of grease, oil and dust.
Apply undiluted Ultra Floor Prime-it MSP to the top of the boards ensuring full and even coverage. Allow
to fully dry.
Apply Ultra Floor Level-it 2 over the entire board area ensuring no voids or air pockets, to a minimum depth of 10mm over the pipes. Allow to fully dry (normally 24-48 hours).
If gluing vinyl or wood floor finishes to the self-levelling layer, first apply undiluted Ultra Floor Prime-it MSP to the top of the Ultra Floor Level-it 2 ensuring full and even coverage. Allow to fully dry.
Installing ThermRite™ PRO Boards as a floating floor – for Interlocking Wood & Laminate floor finishes
For wood and laminate interlocking floating floor finishes, which are not going to be bonded to the panels, the ThermRite™ PRO panels do not require bonding to the subfloor.
Ensure the boards are clean and free of grease, oil and dust.
Lay out the ThermRite™ PRO boards onto the floor, ensuring correct orientation of the boards to match your pipe layout diagram if you have one. Boards can be cut by hand using a utility knife or fine toothed
saw. If slight amendments to the pipe channels are required they can be cut using a utility knife or by electric router. If cutting additional turns into a board you must ensure turns match the radius and are no
sharper than the turns on the manufactured board.
Once all boards are satisfactorily laid into position and the floor area completely covered, the pipe can be installed.
Upon completion and satisfactory test and inspection of the pipe, the wood/laminate floor can be laid. The interlocking wood/laminate floor must be laid at a 90 degree angle to the direction that the pipe runs in (ie the boards run across the length of pipe and not in the same direction as pipe runs).
GUARANTEE:
Our ThermRite PRO Dual Purpose Overlay Panels are covered by a 50-YEAR GUARANTEE when installed as shown in the document above.
NOTE: The maximum permissible floor temperature should be checked with the flooring supplier. General industry standard states a maximum floor temperature should not exceed 27°c for wood and laminate floors (although this should be confirmed for each individual install). In properties insulated to current building standards this temperature will not ordinarily be reached – however in poorly insulated properties this floor temperature may be reached as the floor attempts to heat the room and counteract the escaping heat. A floor sensor can be supplied to protect the floor if in any doubt.